3 things that are stopping you from getting the perfect Dutch braid
Fix the three small mistakes that stop your Dutch braids from looking clean and tight.

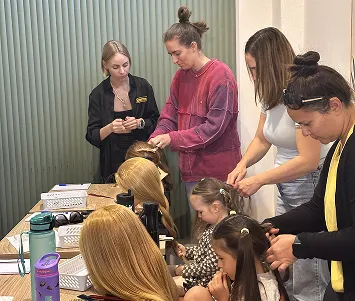
If you’ve ever followed a tutorial step by step and still ended up with a loose, bumpy Dutch braid, you’re not alone. I see this every single week in my studio at Braiding for Parents workshops. It’s never because you’re bad at braiding - it’s because no one has shown you the hidden mechanics that actually make the difference.
Most parents try so hard, but they’re fighting against tiny habits that sabotage the braid before it even starts. And once you know what they are, the whole thing clicks.
Let’s break down the three most common mistakes that are stopping you from getting a clean, tight, beautiful Dutch braid.
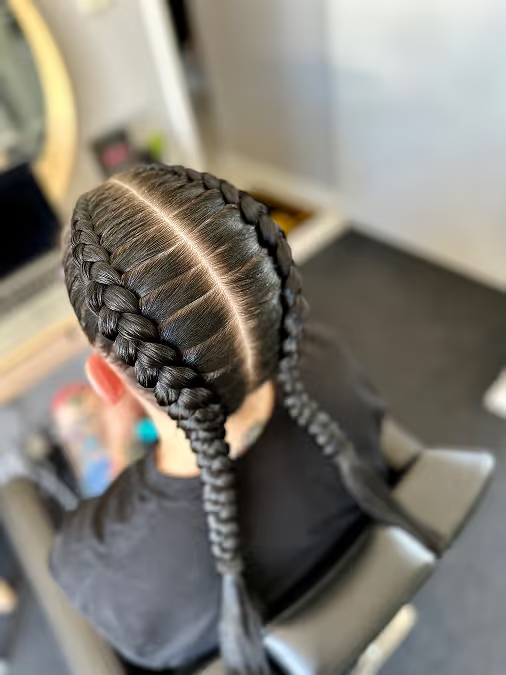
1. Sectioning from the bottom (instead of from the top)
This is the one almost every beginner does without realising.
When you take your opening section of hair to split it into three strands to start a braid, most people come in from underneath this section instead of from the top. When you enter from underneath, you lift and disturb the natural lay of this section. Even if the hair looked smooth a second earlier, this creates tiny twists and crossovers inside the strands before the braid has even started. The result is a messy foundation.
Why this matters:
A Dutch braid gets its shape, alignment, and centre line from the very first split. If your opening section - your first three strands are not clean and even, the braid will always look wonky at the start.
A quick example:
A mum in one of my workshops kept saying, “It always goes wonky at the start.”
We did not change her tension or her hand position. We only changed how she split that very first section - entering from the top instead of from underneath.
A clean start creates a clean braid.
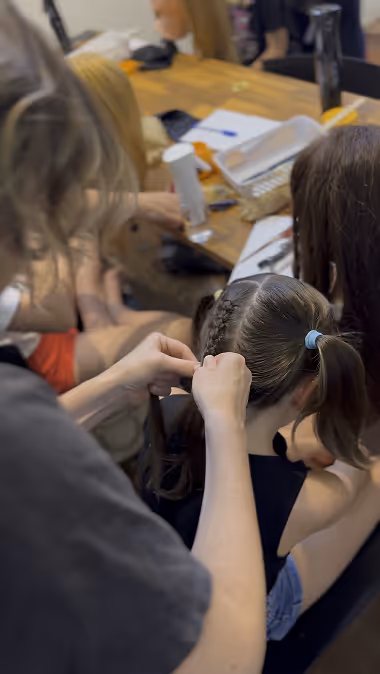
2. Your hands are sitting too far away from the head
This is the classic tension-killer.
When your hands drift away from the scalp, even by a few centimetres, the braid loosens before you feed in the next section. It creates the same effect as someone yanking the braid from behind — everything stretches out and loses shape.
If you’ve ever wondered why your braid looks neat for the first two stitches and then suddenly turns soft or puffy, this is probably why.
Think of it this way: Your hands are the anchor. The closer they stay to the head, the cleaner and tighter the braid.
A real client example:
One dad told me, “I don’t know why it gets so loose, I swear I’m pulling tight.”
In his case, he was lifting his hands up every time he crossed a strand. The tension wasn’t the issue - the distance was.
As soon as I guided his hands back down toward the scalp, the braid completely transformed. He actually said, “Oh wow… that makes so much sense.”
It usually does, once someone shows you.
3. Standing up while braiding the nape of the neck
The braid always behaves differently at the bottom. That’s where most parents lose control — not because they’re doing something wrong, but because the angle changes and no one warns them about it.
If you stay standing once the braid reaches the nape, your arms naturally pull the sides upward. That causes:
- bubbles on the sides
- lifted sections
- a braid that sits on top of the head instead of hugging it
It’s not you. It’s the position.
The fix:
Lower your stance or sit down as you reach the bottom. This keeps the angle flatter and stops the braid from lifting.
A workshop moment I’ll never forget:
A mum gasped - literally gasped - when I told her, “Sit down now.” She sat, continued braiding, and the bottom half looked completely different. She looked at me like I’d just shown her sorcery.
But it’s not magic. It’s technique.
The good news
None of these mistakes mean you’re bad at braiding.
They just mean no one has broken the process down for you in a way that actually works for beginners.
Once you fix:
- the first section
- your hand placement
- your body position
your Dutch braids instantly look cleaner, flatter, and more consistent.
You don’t need new products.
You don’t need more tutorials.
You just need the right guidance.
Want to learn the perfect Dutch braid, step by step?
If you want to finally understand braiding in a simple, beginner-friendly way, check out my online course designed specifically for parents. You’ll learn Dutch and French braids step by step, exactly how I teach them in the studio.
What we do
From world-class braiding services to workshops and online courses that build confidence.